Data Facts provides Human Resource Professionals with cutting-edge, top-of-the-line background screening technology and personalized support and service.
Greenhouse Recruiting's integration with Data Facts allows users to send a background check request form to candidates automatically from within Greenhouse Recruiting.
Create a Harvest API Key for the Greenhouse Recruiting / Data Facts Integration
To configure the Greenhouse Recruiting / Data Facts integration, you'll need to create a Harvest API key.
Follow the steps in this article to create the key, and verify that the credentials and permissions below are selected when configuring the Data Facts integration.
Credentials
In the Create New Credential box, make the following selections:
- API type: Harvest
- Partner: Data Facts
- Description: Data Facts Harvest API key
Permissions
Verify that the following permissions are selected for the Data Facts integration:
- Activity Feed
- GET: Retrieve Activity Feed
- Candidates
- GET: Retrieve Candidate
- GET: List Candidates
- PATCH: Edit Candidate
- Custom Field Options
- GET: Custom field options
- POST: Create custom field options
- PATCH: Update custom field options
- Users
- GET: Retrieve User
- GET: List Users
Create a webhook
To integrate Data Facts with Greenhouse Recruiting, you'll need to create a webhook. Follow the steps in this article to create your webhook. Use the values listed below to configure the webhooks.
- Name: A descriptive name for your integration. Most customers choose 'Data Facts integration'
- When: Candidate has changed stage
- Endpoint URL: https://apiaN.tiltingwindmills.com/service/grnhs/[WILL BE PROVIDED]/ApplicantEvent
- Note: Production host is assigned at go-live. The "N" in apiaN is specifically assigned (apia1, apia2, etc.) at go-live
- Secret Key: The XML username set up for the integration
- Error Recipient Email: A responsible party from the client, and other parties that need to be notified of Greenhouse Recruiting errors
Provide Data Facts a Greenhouse Recruiting User ID
In order to send information from Data Facts to Greenhouse Recruiting using the Harvest API key, Data Facts will need a Greenhouse Recruiting User ID to associate with the data. This user account must be a Site Admin, but does not require any additional user-specific permissions. You can also create a new user for this integration.
To retrieve this User ID, export your user list to Excel and find the correct User ID in the list. Then, provide this User ID to the Data Facts team.

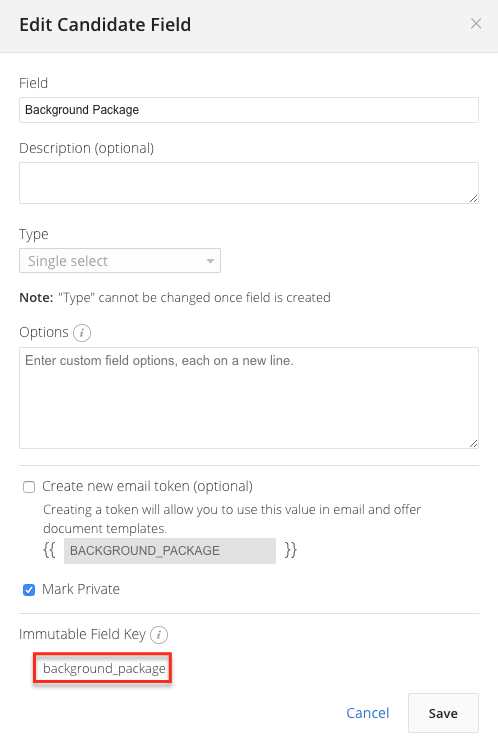
Create custom candidate fields
This portion of the configuration allows you to select a background screening package for the candidate, as well as to receive a URL to the candidate's results after the background screening is completed by Data Facts.
Create two custom users field using the following options.
Field 1: Background package
- Field Name: Background Package
- Type: Single-select
Field 2: Background Report
- Field Name: Background Report.
- Type: URL
After its created, each field will have an Immutable Field Key. Provide both keys to the Data Facts team.
Add background check stage to interview plan
Next, modify an interview plan and add a background check stage.
You'll need to repeat this step for each job that you want to integrate with Data Facts.
Use the Data Facts integration
You can request a candidate's background check by moving them to the Background Check stage.
Before they can be moved into the stage, you'll need to select the background package under the Details tab on their candidate profile.
Under the Additional Details panel, find the Custom Candidate Field named Background Check and select the correct package from the dropdown. Click Save when you are finished.
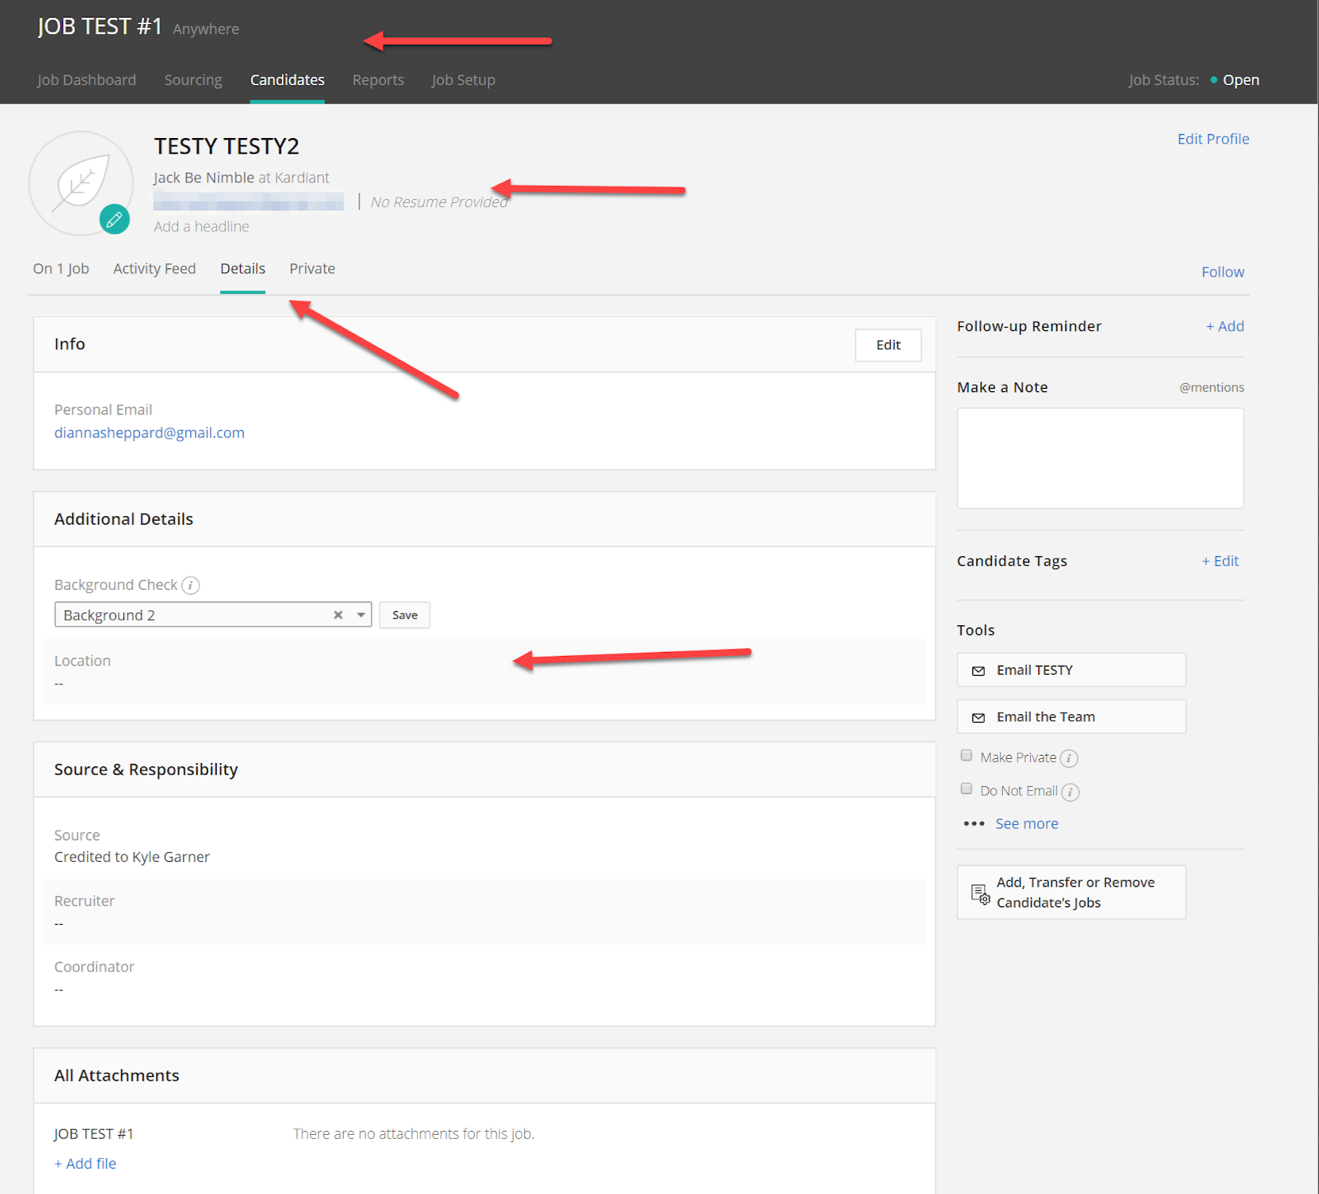
Once the package is chosen, advance the candidate to the Background Check stage. The candidate information will be sent to Data Facts to begin the background screening process. You can see updates about the status of the background screening by clicking the URL in the Background Report Custom Candidate Field.
Note: The background screening request is sent to Data Facts as soon as the candidate is moved to the Background Check stage.
If the candidate is moved to the Background Check stage before the Background Check Package is selected, no information about the requested package will be sent to Data Facts. To resolve this issue, move the candidate backward one stage, select the Background Check Package, and then advance the candidate to the Background Check stage again.