Rolebot is the World’s 1st AI-powered Job Board for Passive Talent, delivering the other 75% that never applies. The first - and most important step - is identifying an ideal candidate for your role. Rolebot's search technology then provides you with a list of recommended talent based on the selected profile. This process alone helps save hundreds of hours that are otherwise spent on job descriptions, job postings, and sifting through resumes or evaluations.
Furthermore, Rolebot supports you in eliminating the complexity of outreach, by scheduling the initial interview.
Greenhouse Recruiting’s integration with Rolebot allows you to complete the following actions:
- Launch Greenhouse Recruiting jobs in Rolebot
- Link Greenhouse Recruiting jobs to Rolebot roles
- Create Candidates in Greenhouse Recruiting from existing ones in Rolebot
- Search for Rolebot candidates in your company’s Greenhouse Recruiting account
Configure setup permissions in Greenhouse Recruiting
To configure the Greenhouse Recruiting/Rolebot integration, you’ll need the developer permission Can manage ALL organization’s API Credentials.
To assign this permission, find a Greenhouse Recruiting user in your organization with Site Admin level permissions and the specific Can edit another user's advanced permissions role to update your account.
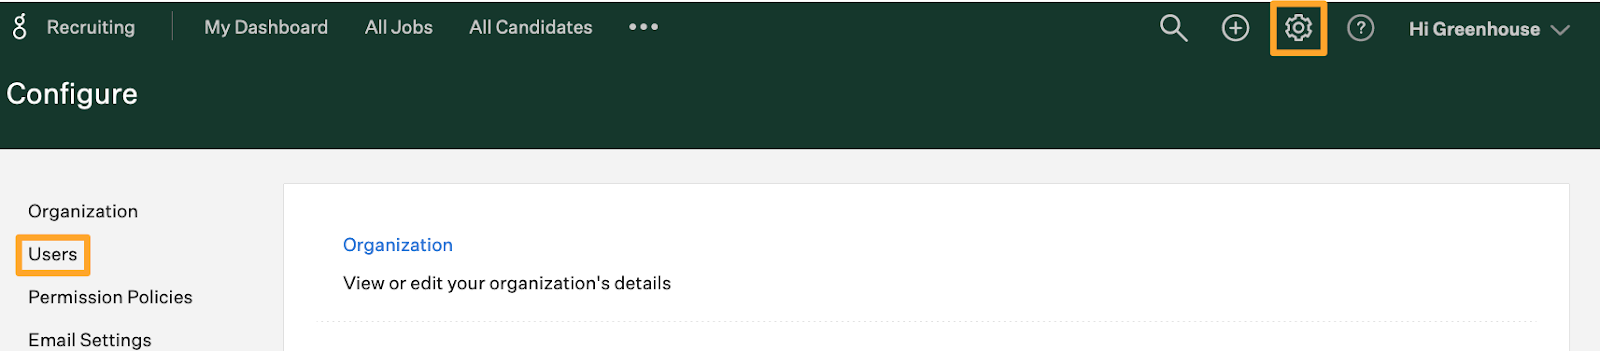
This permission can be updated by navigating to the user page. (Configure icon ![]() > Users > Your Name)
> Users > Your Name)
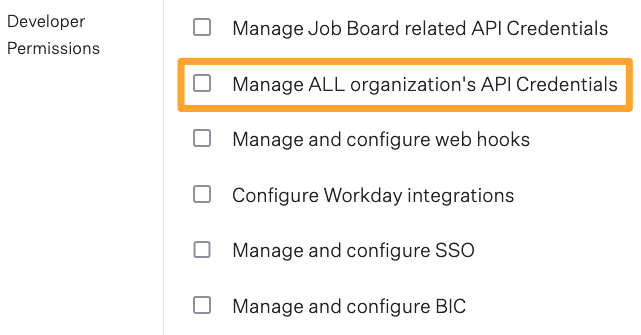
Scroll to the Permissions panel on your user page and expand the Developer Permissions dropdown menu.
Select Can manage ALL organization’s API credentials in the Developer Permissions section and click Save.
Repeat as necessary for any other user that needs to set up the integration.
Create a Harvest API Key for the Greenhouse Recruiting/Rolebot integration
Note: To generate an API key, you must have the developer permission Manage ALL organization's API Credentials.
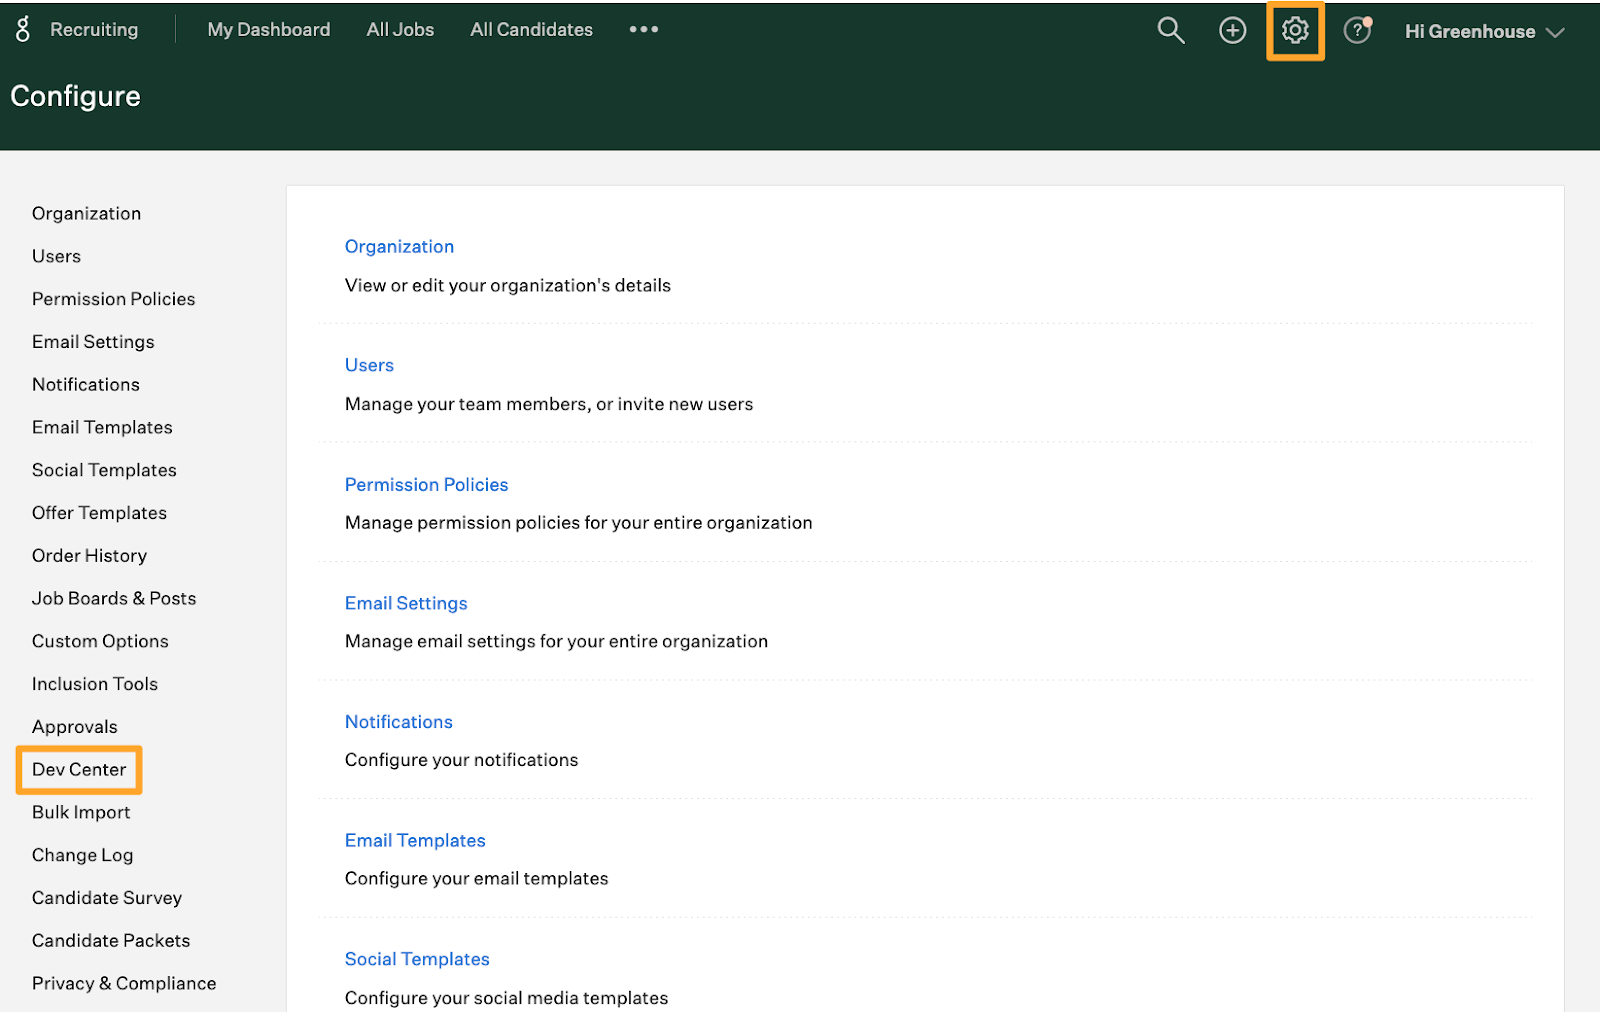
Click on the Configure icon ![]() and select the Dev Center on the left panel.
and select the Dev Center on the left panel.
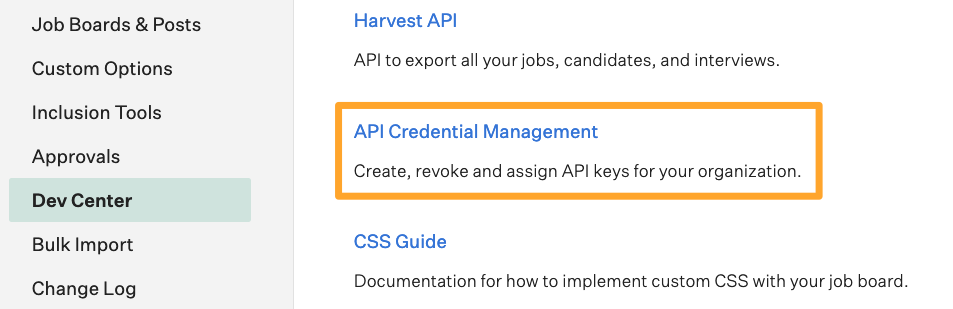
Select API Credential Management in the Dev Center.
From the API Credential Management page, click Create New API Key to generate the API key for Rolebot.

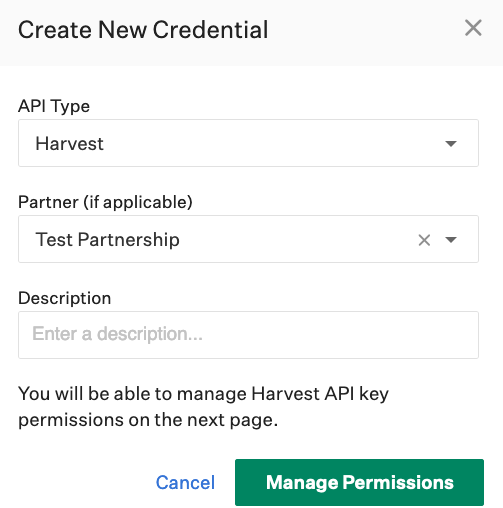
In the Create New Credential dialog box, make the following selections:
- API Type: Harvest
- Partner:
- Description: Rolebot Harvest API Key
Click Manage Permissions.
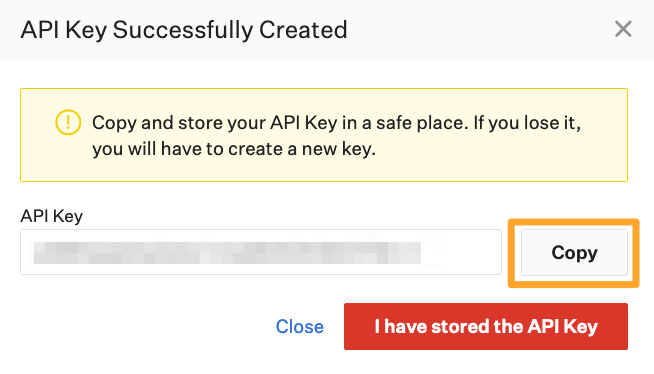
Click Copy to save your API key to your clipboard. Store the API key in a secure location to provide to Rolebot in the next step.
Click I have stored the API Key once you have copied and saved the key.
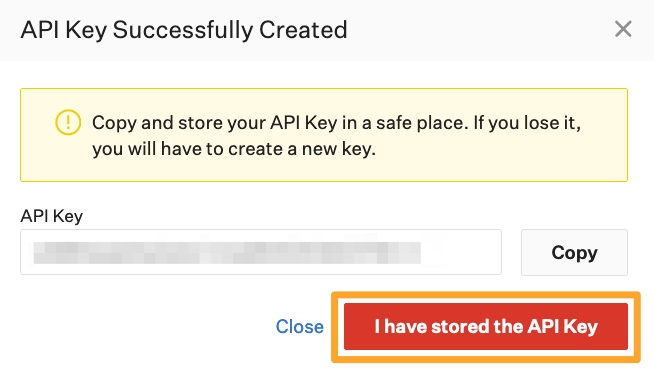
Note: You won’t be able to view the API key after clicking I have stored the API Key. If you lose your API key or need to access it later, you’ll need to generate a new key and provide it to Rolebot.
Select the checkboxes next to each permission box to associate it with the API key.
Applications
- Get: Retrieve Application
- Get: List Applications
- Patch: Update Application
- Post: Advance Application
- Post: Hire Application
- Post: Move Application
- Post: Reject Application
- Post: Moves Application to Job
- Post: Unreject Application
- Post: Add Attachment to Application
- Patch: Update a rejected application's rejection reason
Candidates
- Get: Retrieve Candidate
- Get: List Candidates
- Patch: Edit Candidate
- Post: Add Candidate
- Post: Add Note
- Post: Add E-mail
- Post: Add Attachment
- Post: Add Application
- Post: Add Education
- Delete: Delete Education
- Post: Add Employment
- Delete: Delete Employment
- Post: Add Prospect
- Put: Anonymize Candidate
- Put: Merge two candidates
Users
- Delete: Remove a future job permission
- Get: Retrieve User
- Get: List Users
- Patch: Update a user
- Get: List User Future Job Permissions
- Get: List User Job Permissions
- Get: List Pending Approvals
- Patch: Enable User
- Patch: Disable User
- Put: Add a job permission
- Put: Create a future job permission
- Post: Add User
- Post: Add User E-mail Address
- Patch: Update User permission level
Jobs
- Get: Retrieve Job
- Get: List Jobs
- Patch: Update Job
- Post: Create a new job
- Get: Get hiring team
- Post: Add hiring team member
- Delete: Remove hiring team member
- Put: Replace hiring team
Job Posts
- Get: List Job Posts
- Get: Retrieve Job Post for Job
- Get: List Job Posts for Job
- Patch: Update job posts
Sources
- Get: List Sources
When you’re finished, click Save.
Next, navigate to the Sources page. (Configure icon > Custom Options on left-hand panel > Sources).
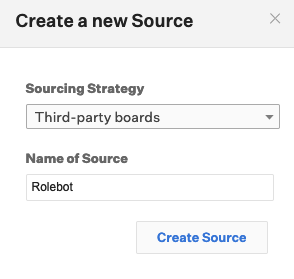
Click Create New Source.
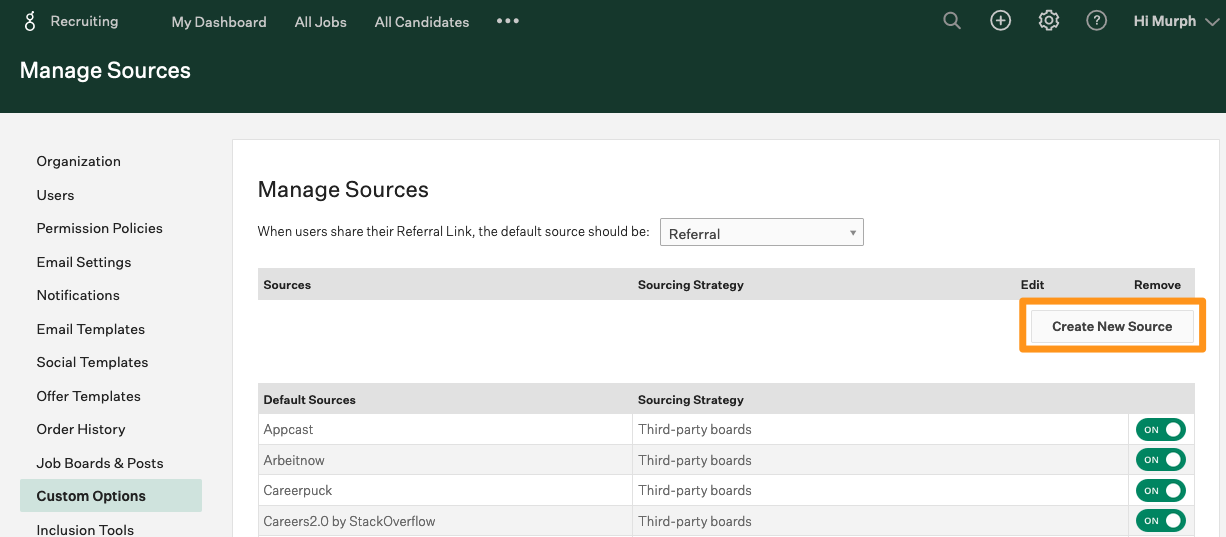
Select Third-party boards from the Sourcing Strategy dropdown. Then, name the Source Rolebot. When finished, click Create Source.
Your Harvest API key for the Greenhouse Recruiting/Rolebot integration is created and configured.
Finish setup in Rolebot
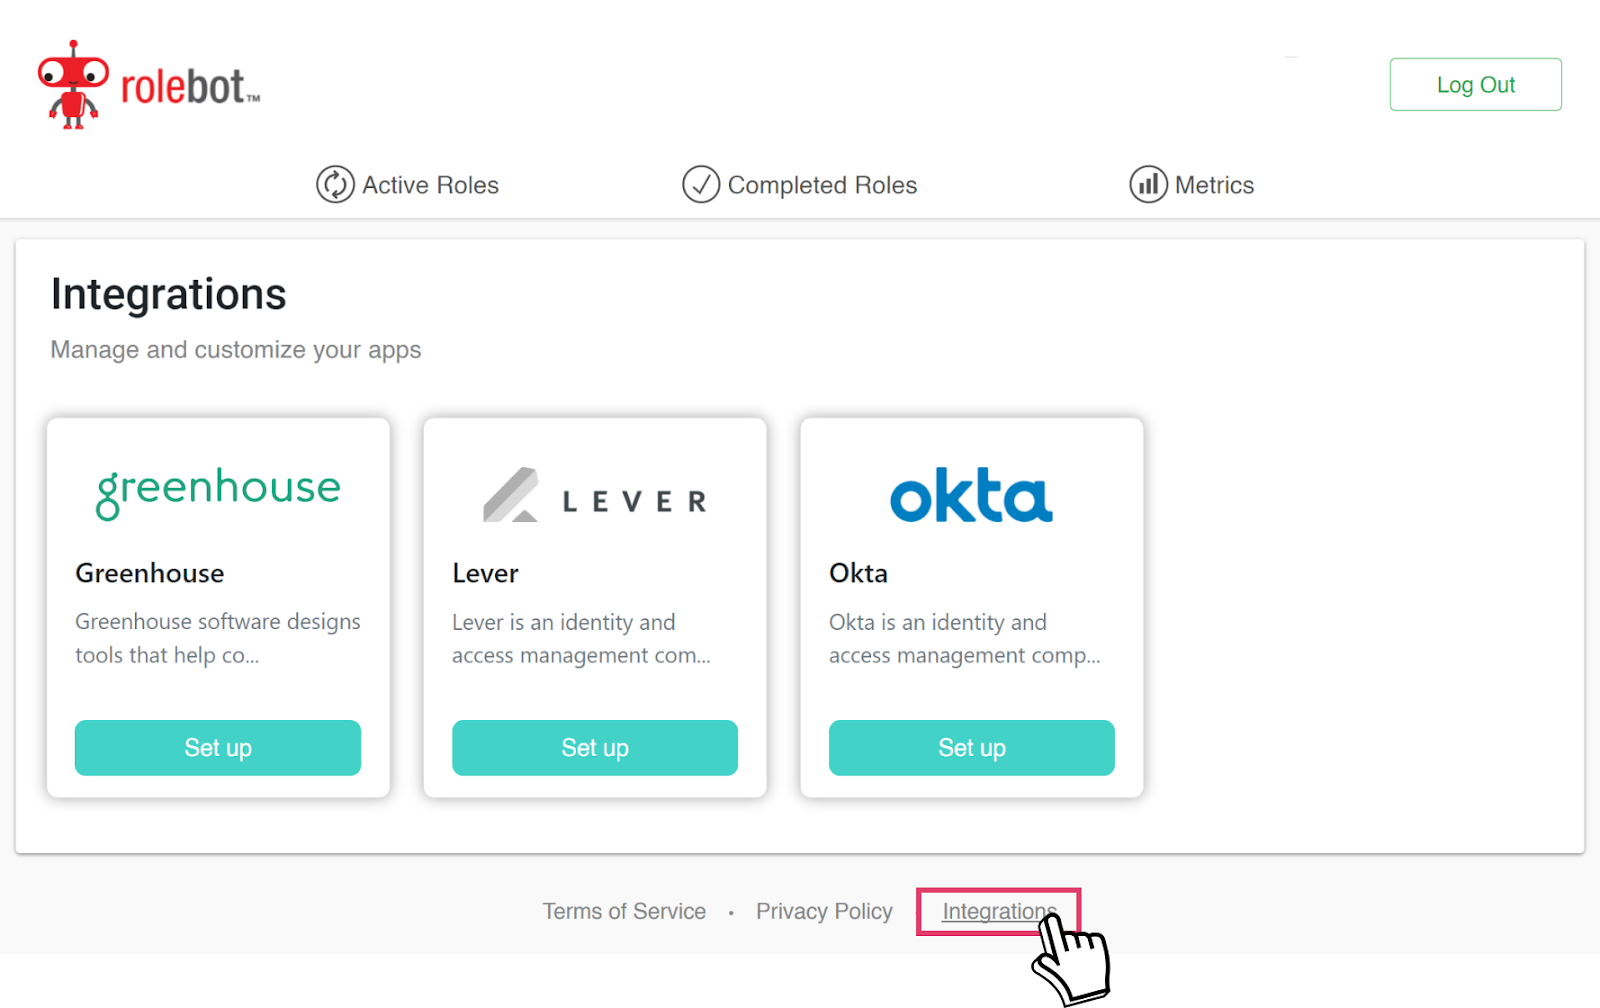
Log into Rolebot and click on Integrations at the bottom of your Rolebot Dashboard to open the Integrations Panel.
Note: You must be an Admin in Rolebot to access the Integrations Panel.
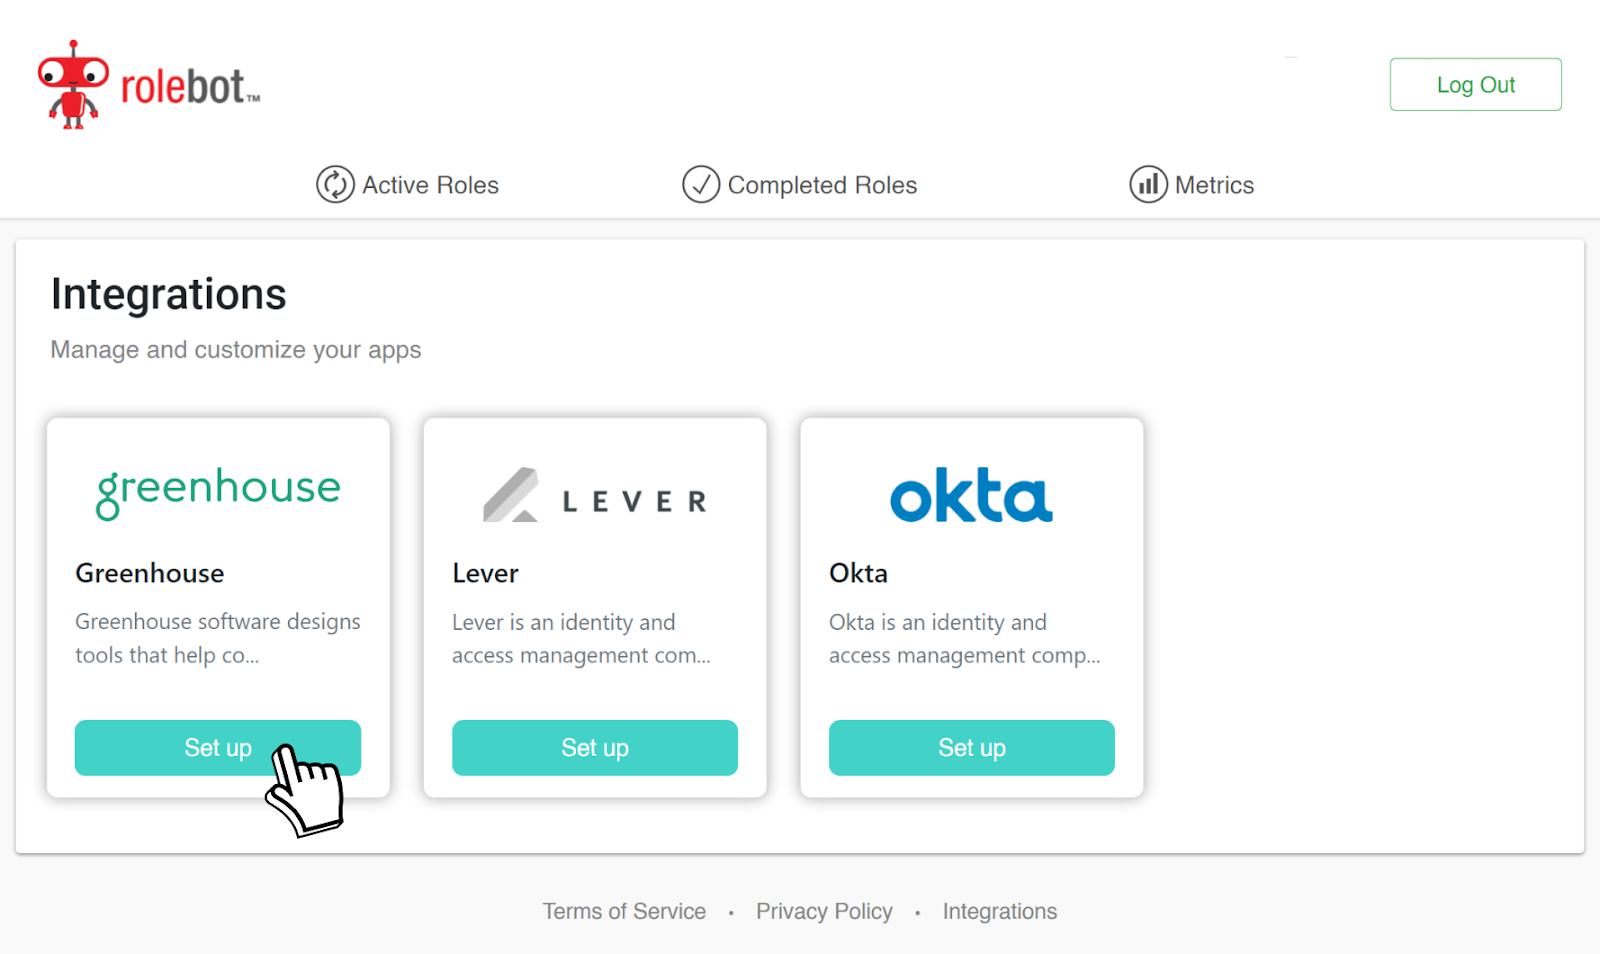
Search for Greenhouse and click Set up.
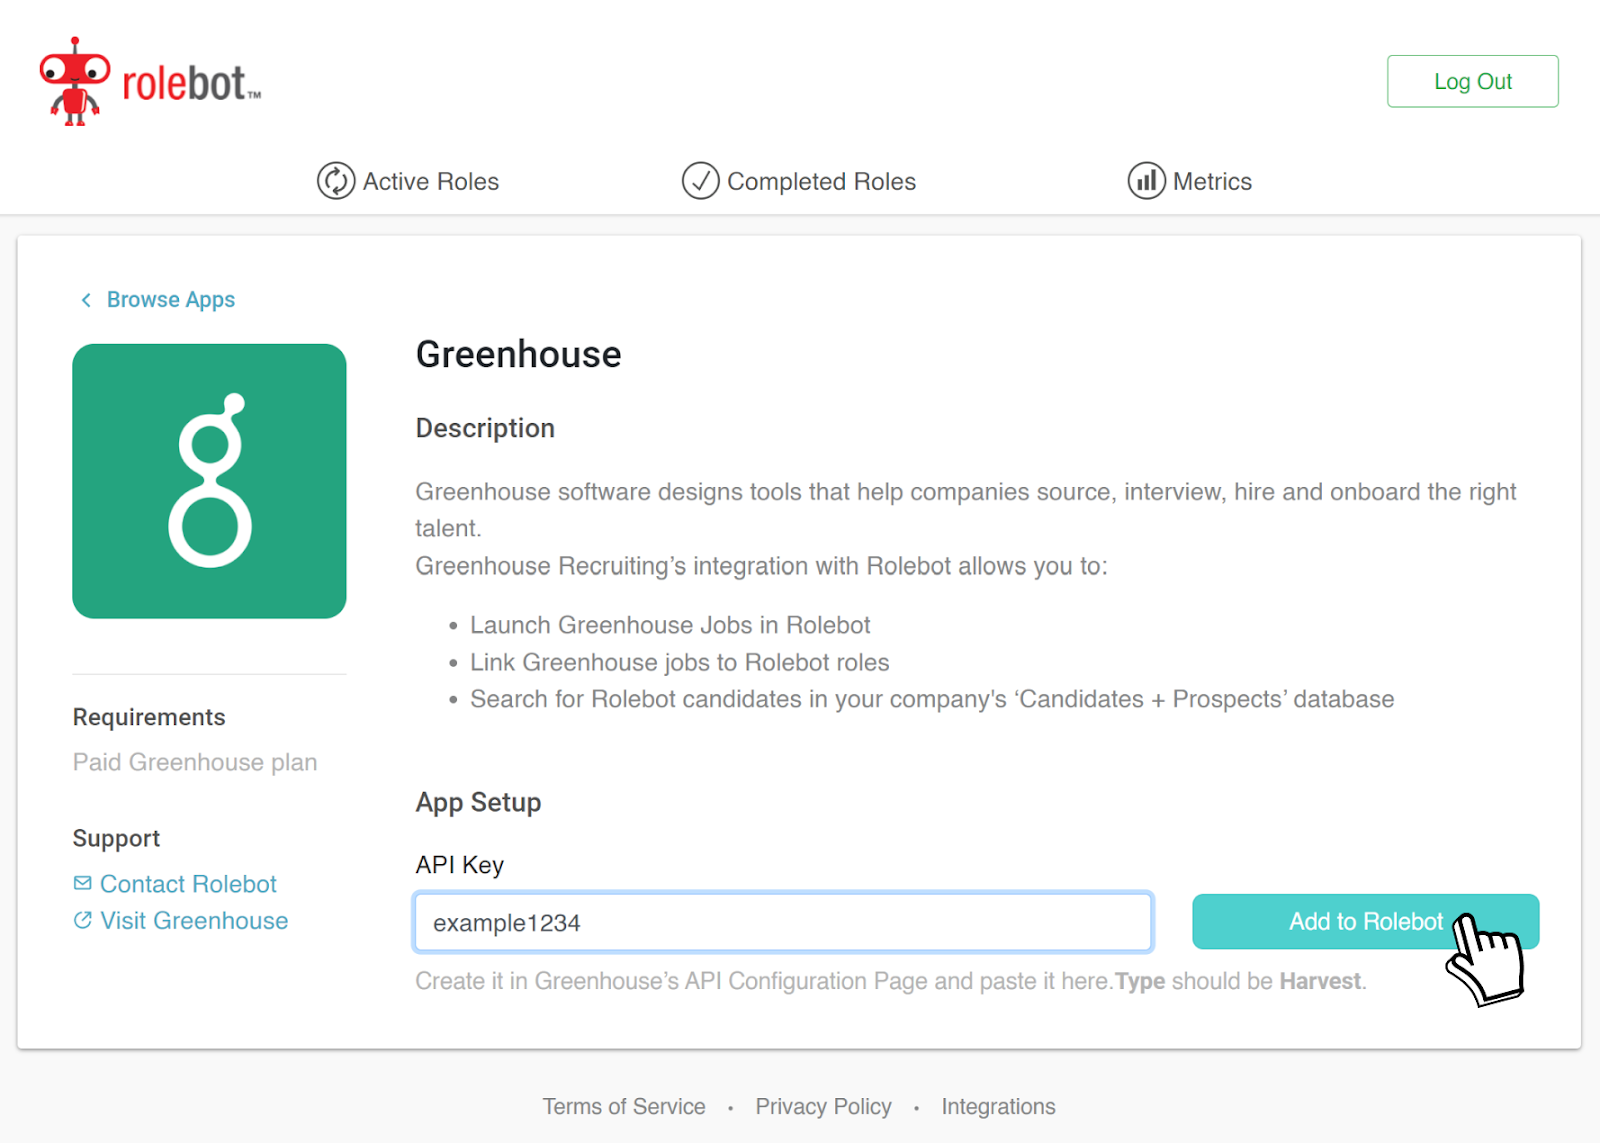
Paste the Greenhouse Harvest API key in the App Setup section of the Greenhouse window. After you pasted the key, click Add to Rolebot.
Use the Rolebot Integration with Greenhouse Recruiting
See the following sections for more information on how to use specific Rolebot features with Greenhouse Recruiting:
- Launch Greenhouse Recruiting jobs in Rolebot
- Link Greenhouse Recruiting jobs to Rolebot roles
- Search for Rolebot candidates connected to your Greenhouse Recruiting account
Launch Greenhouse Recruiting jobs in Rolebot
Navigate to the Active Roles section in Rolebot and click on the plus sign icon ![]() in the top right corner of the page.
in the top right corner of the page.  Select the Greenhouse tab in the pop-up window.
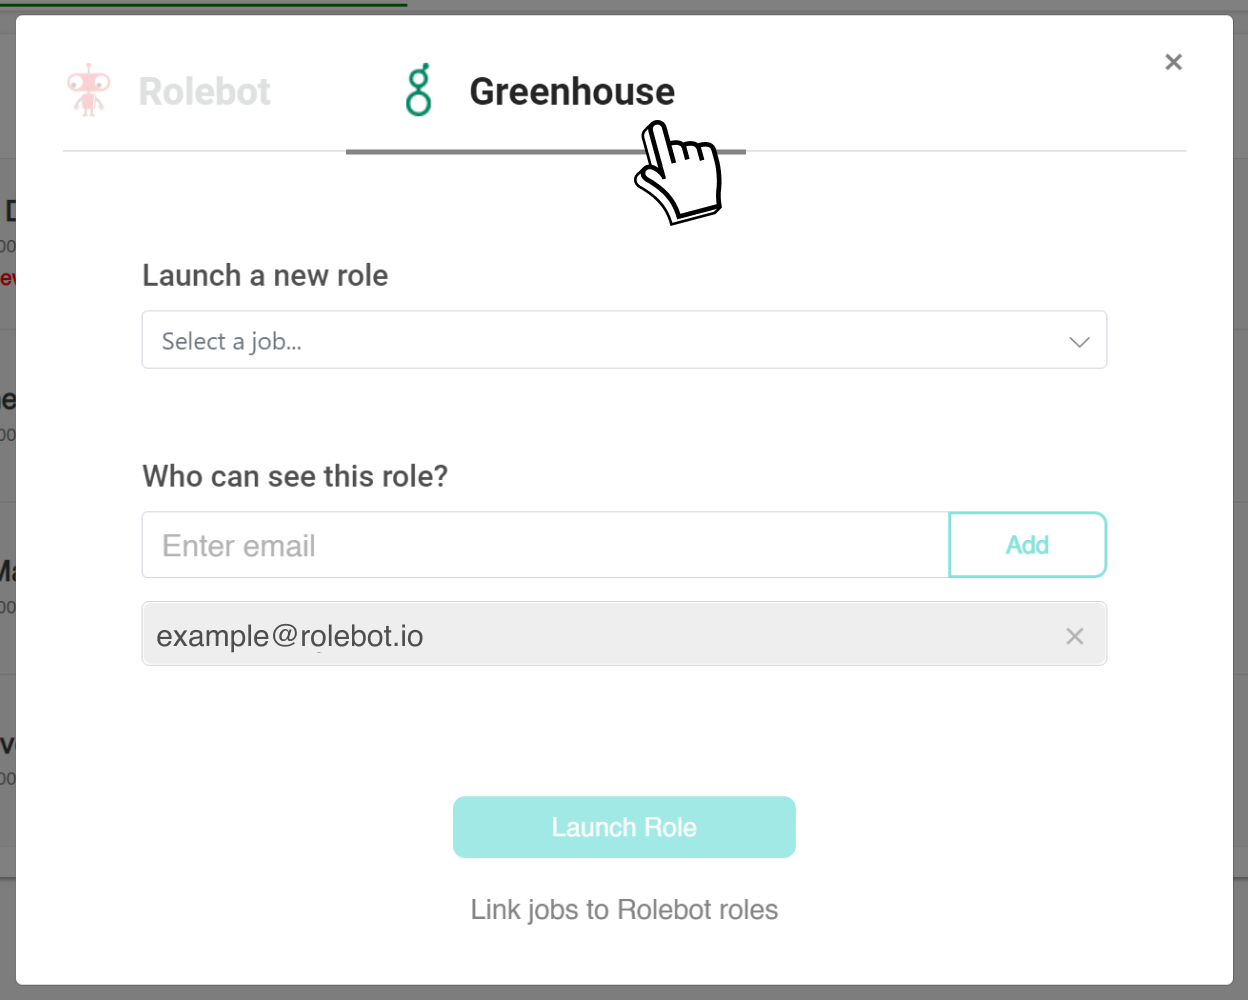
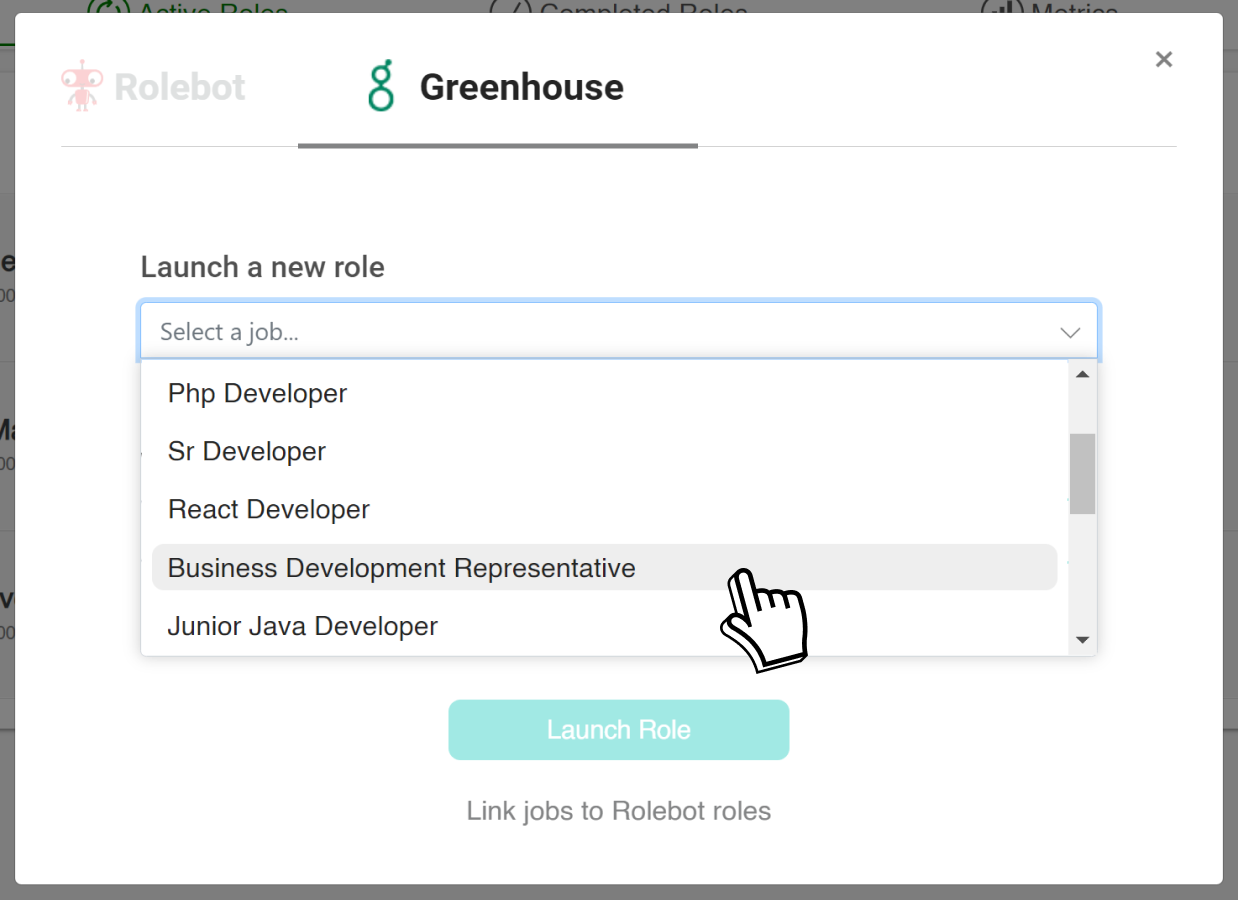
Select an option from the Launch a new role field. Roles are displayed with its corresponding Req ID for easy identification.
Enter the emails of the users who should have access to the role. 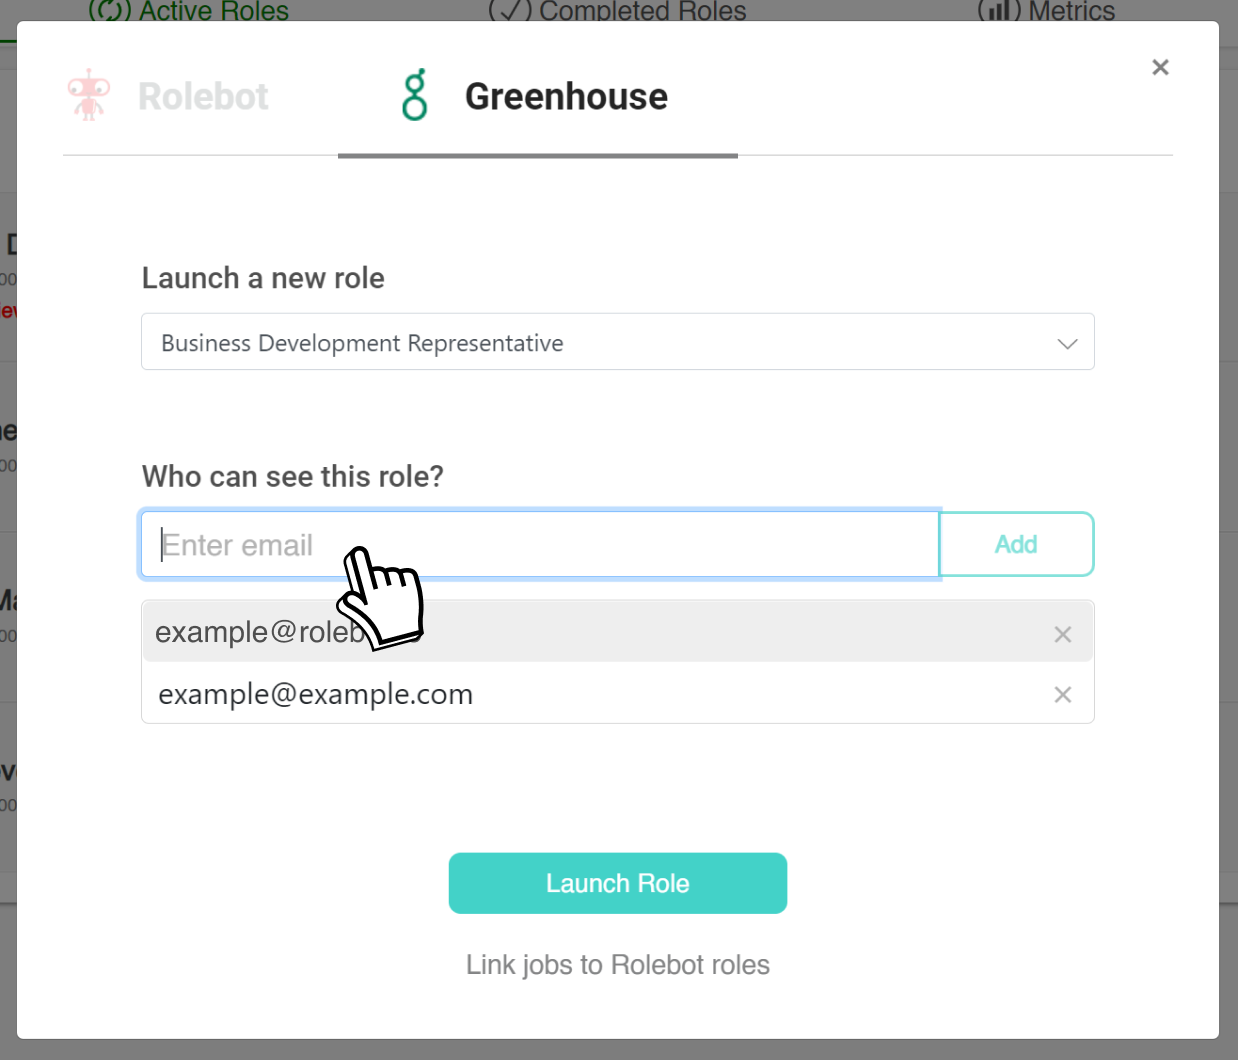
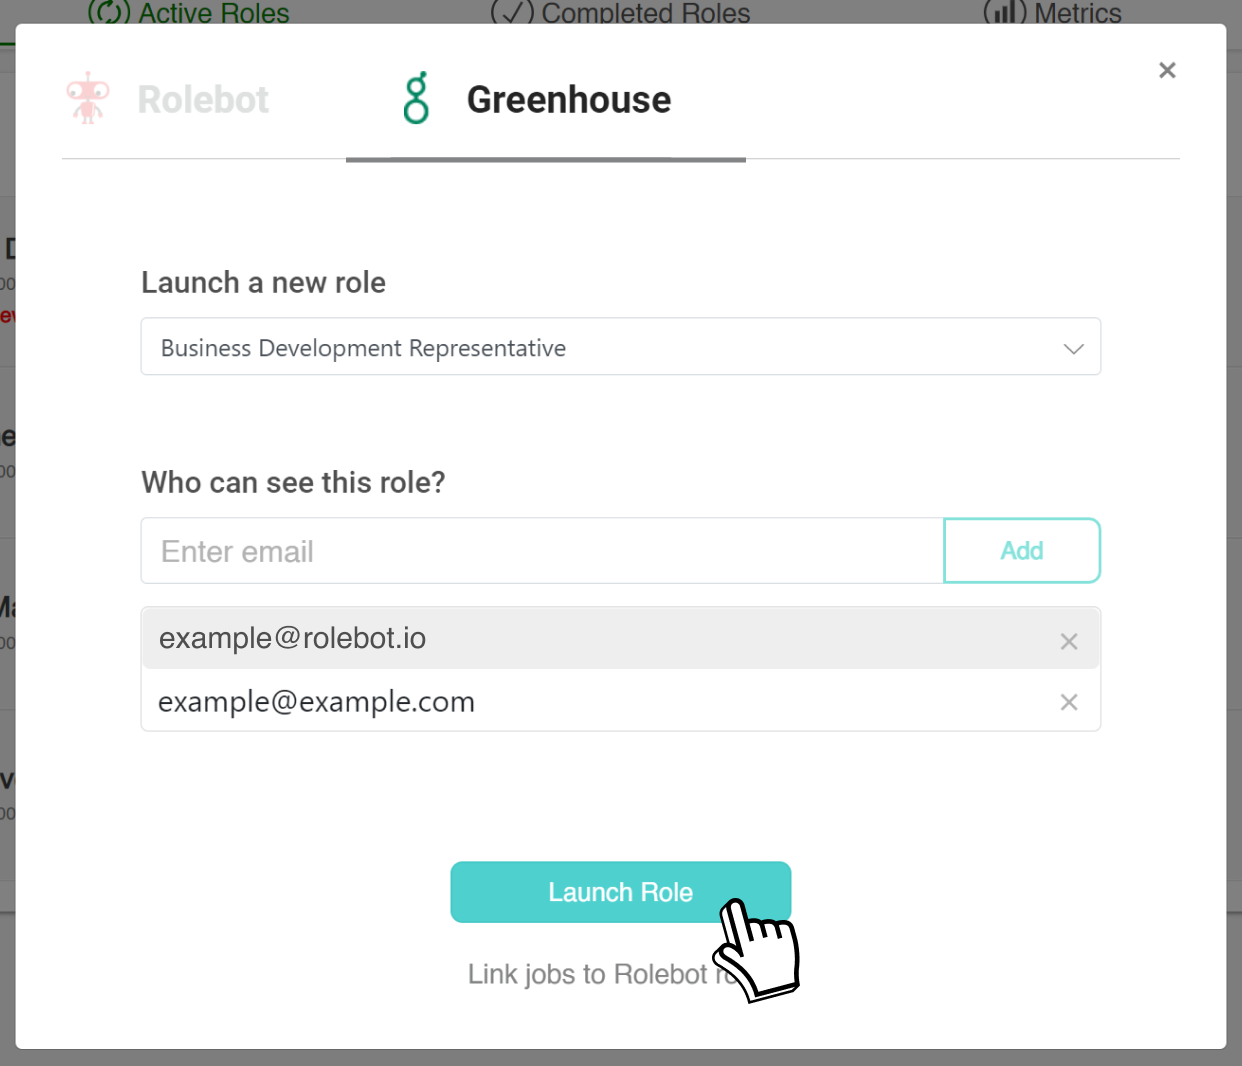
Once you’re done, click on the Launch Role button.
Note: The job must have a Job post description in Greenhouse Recruiting to successfully launch it in Rolebot.
After it's launched, the role will appear in Rolebot and will be ready for Rolebot to start matching you with potential candidates.
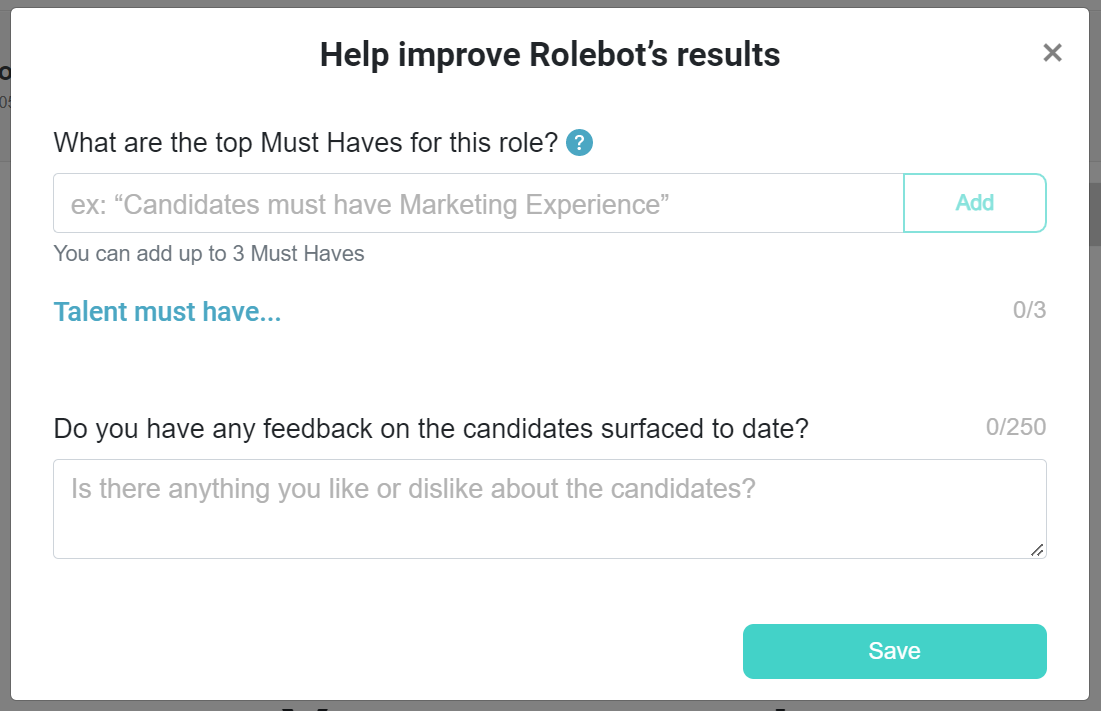
You can add additional information to help improve Rolebot’s candidate results.
To do so, click on the Role to open it. Select either Improve Results or Settings

The Improve Results dialog box allows you to add ‘Must Haves’ and share feedback if candidates have already surfaced for that role. Click Save when finished.
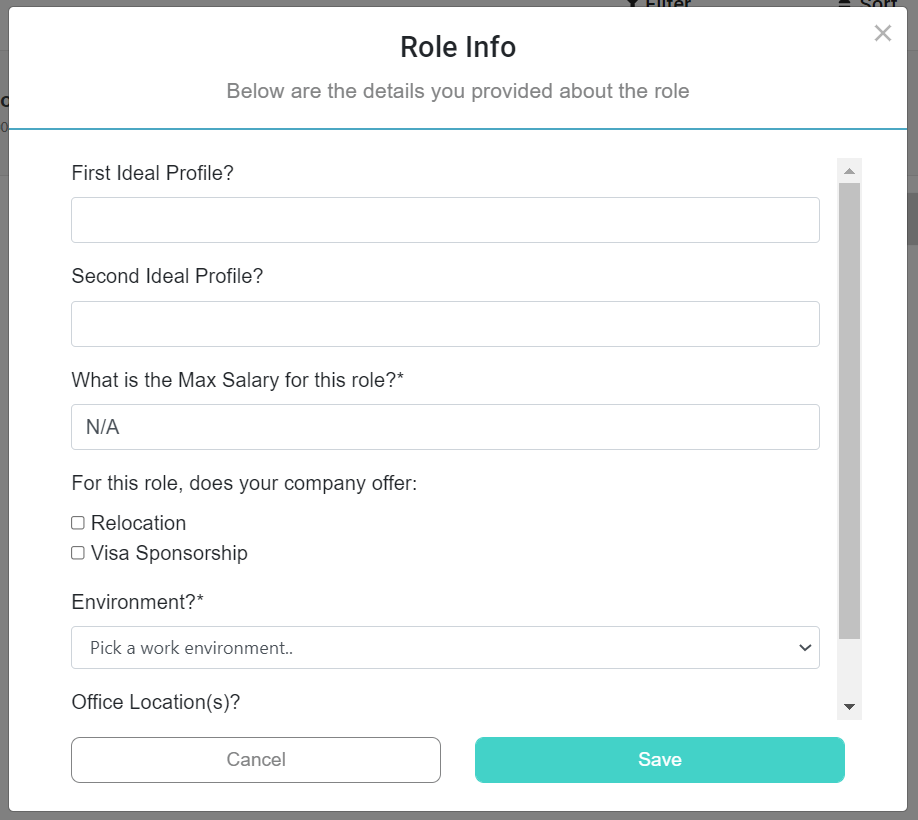
The Settings button opens a list of options to configure.
Note: Adding additional settings is not mandatory, but it is recommended for more accurate results.
To add more information to the role, click on Role Info. Here, you can add two links to your ideal profiles. For example, the candidates you consider are similar to the candidates you are searching.
You can also include more information to narrow your search and improve the results.
Once finished, click Save.
Link jobs in Greenhouse Recruiting to Rolebot roles
In Rolebot, navigate to the Active Roles section and click on the plus sign icon ![]() in the top right corner.
in the top right corner.
Select the Greenhouse tab in the pop-up window.
Click Link jobs to Rolebot roles at the bottom of the window. 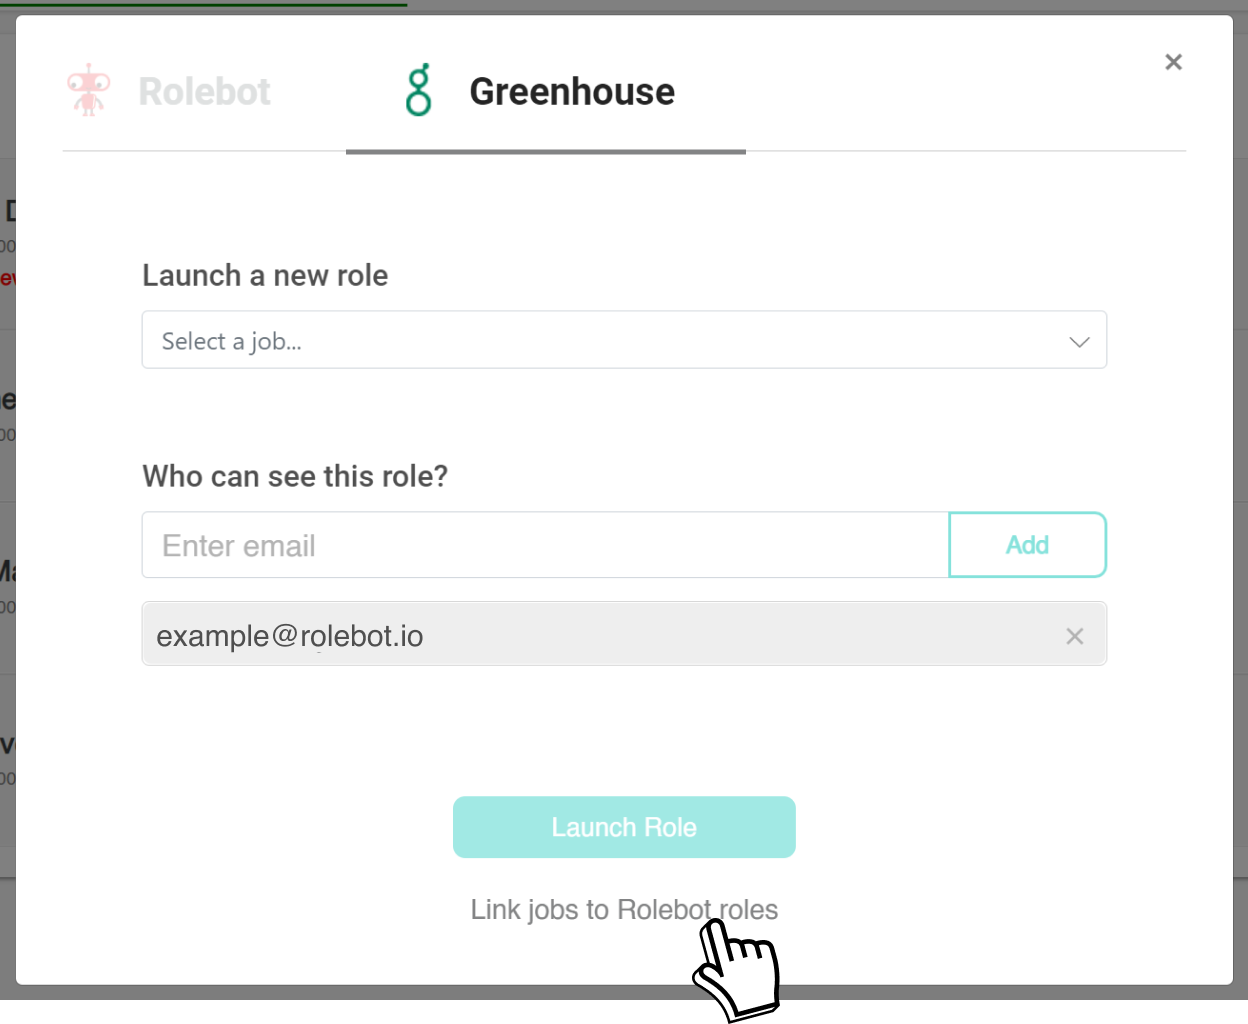
Select the job in Greenhouse Recruiting for each active role you want to link. If a job hasn't been linked to Greenhouse Recruiting yet, it will show up at the top of the page.

After you've selected each job you want to link, click Save Changes.
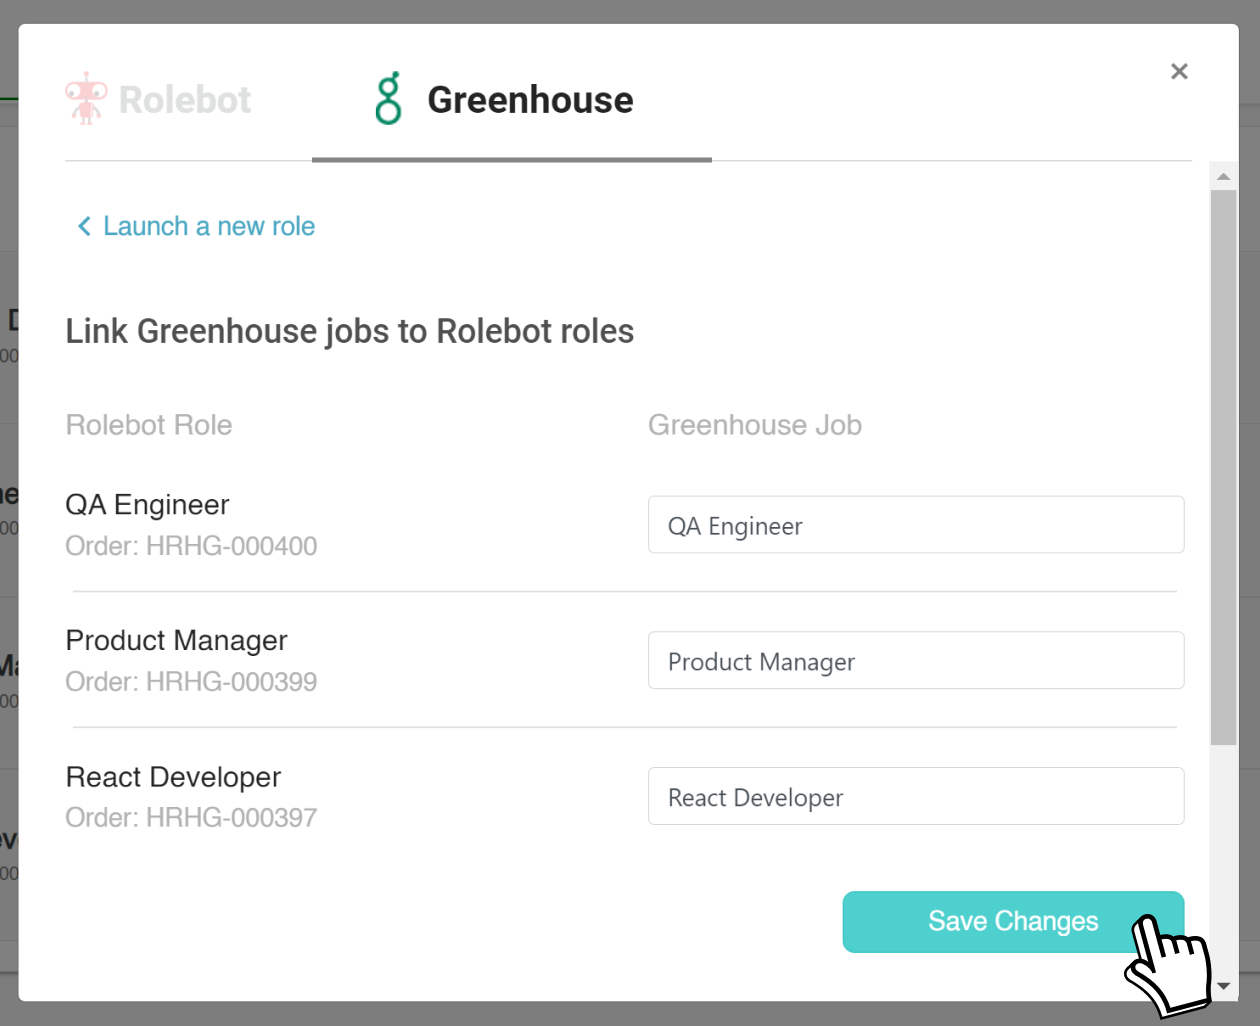
Note: If any Greenhouse Recruiting jobs have already been linked to Rolebot roles, they'll show up under the Linked Greenhouse Recruiting roles section of the list.
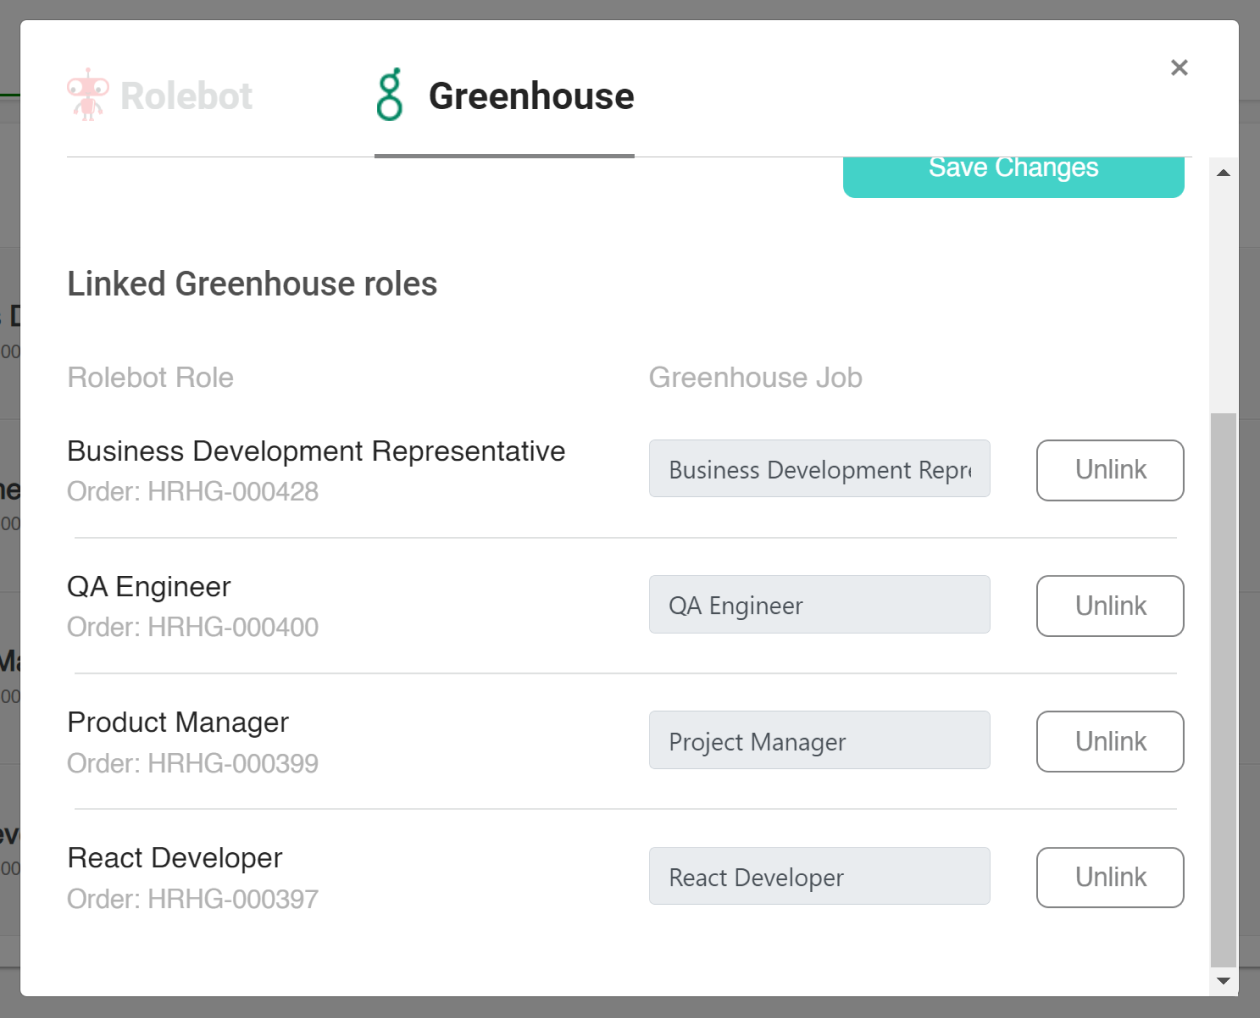
When a job is linked, a Greenhouse logo will display next to the role in the Active Roles section. 
Search for Rolebot candidates connected to your Greenhouse Recruiting account
Open a role in Rolebot that contains talent. If the candidate was linked from Greenhouse Recruiting, a Greenhouse logo will display next to the candidate's name.
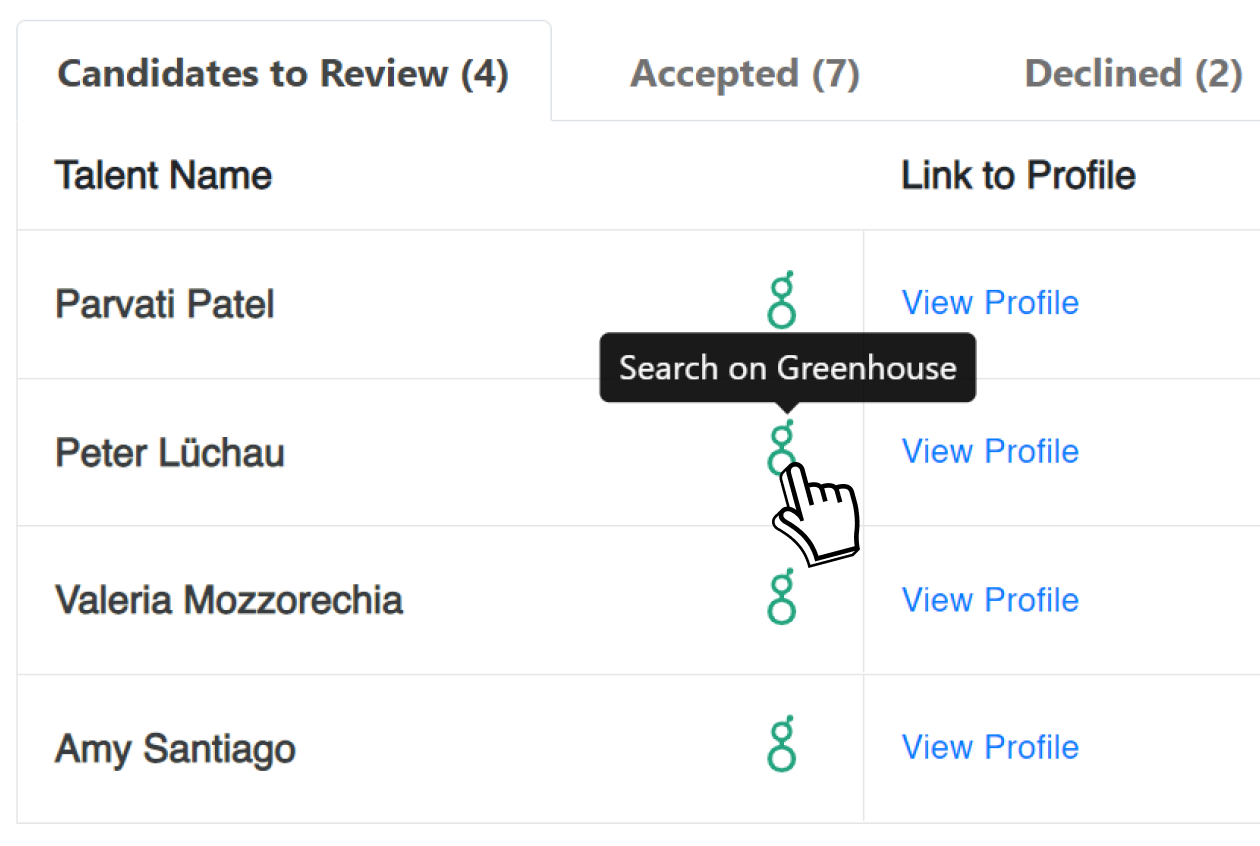
Click on the Greenhouse logo next to the candidate you’d like to search for in your candidate and prospect pools in Greenhouse Recruiting. Greenhouse Recruiting will open in a new tab.
Note: If the new tab doesn’t open automatically, a pop-up blocker may be stopping the link from working. Verify that you're allowing pop-ups from Rolebot to fix this issue.

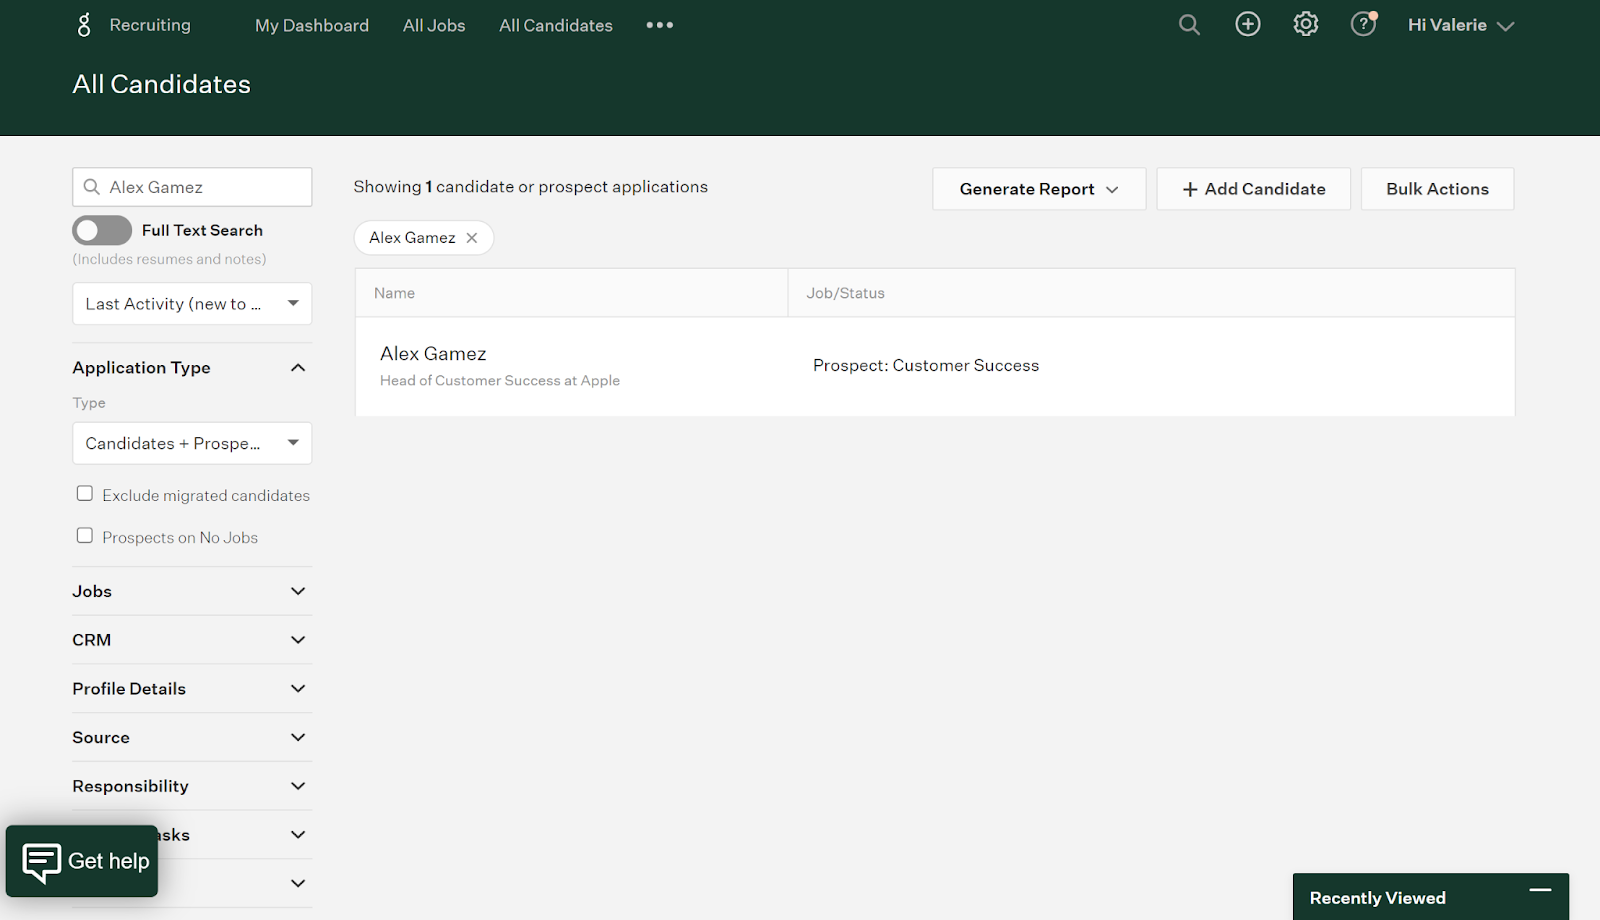
When you switch to the Greenhouse Recruiting tab, a list of candidates and prospects that match Rolebot's candidate name will display.
Automatically export candidates from Rolebot to Greenhouse Recruiting
Note: The Greenhouse Recruiting job must be linked to the role in Rolebot in order to export candidates automatically.
Once candidates are surfaced on a Rolebot role, you will have the option to Accept, Reject, or Skip them.
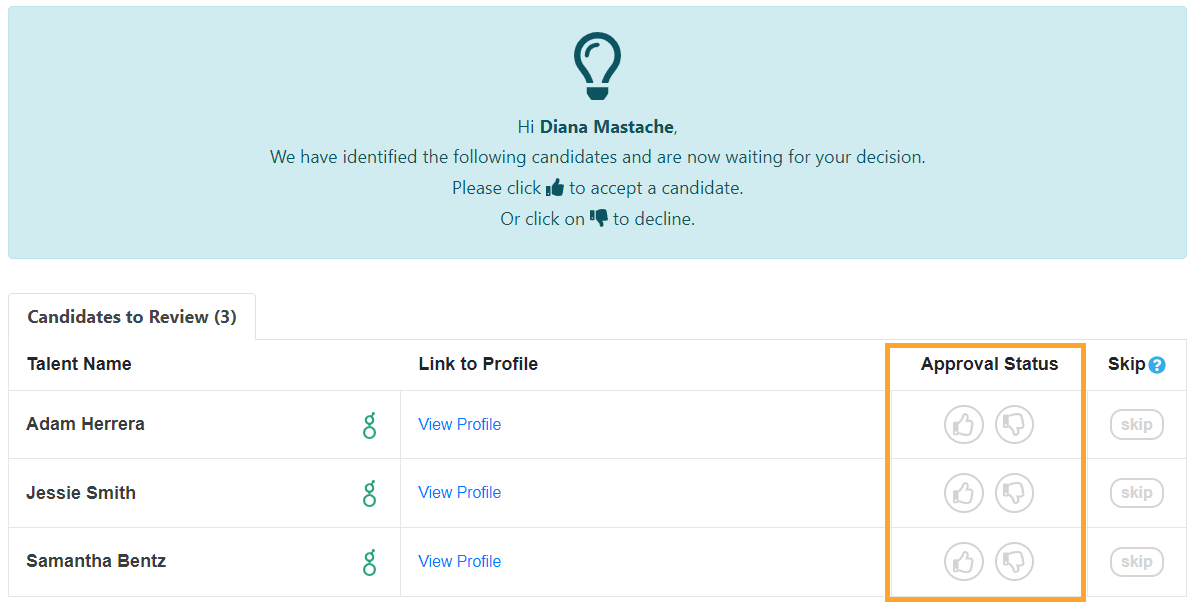
If a candidate is accepted, they will automatically be created as a Candidate on the linked job in Greenhouse Recruiting.

Once a candidate is accepted, all of their existing information in Rolebot will be exported to Greenhouse Recruiting. For example, their email, phone number, or social media.
Note: Rolebot will recognize if the candidate is already in Greenhouse Recruiting and will prevent creating duplicates.
Additional support
Before using the Greenhouse Recruiting and Rolebot integration, you'll need a Rolebot account. To sign up for an account with Rolebot contact hello@rolebot.io.
Please contact support@rolebot.io for troubleshooting assistance regarding the integration.